How do I create and send appointment reminders?
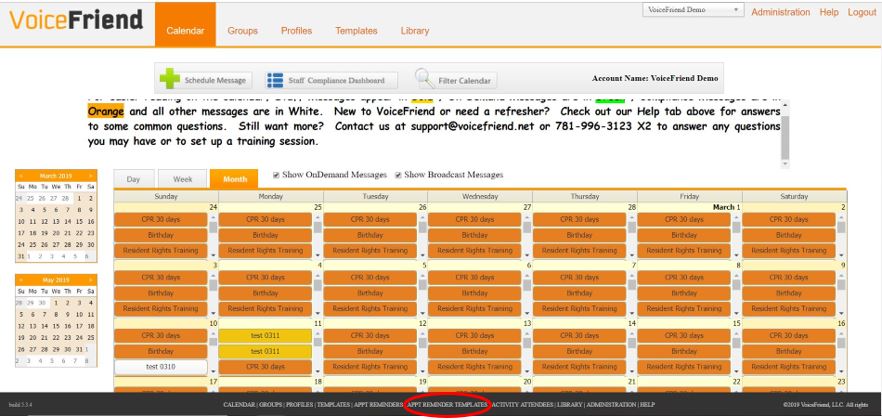
1. Go to the Calendar. At the very bottom of your screen on the black bar, click Appt Reminder Templates.
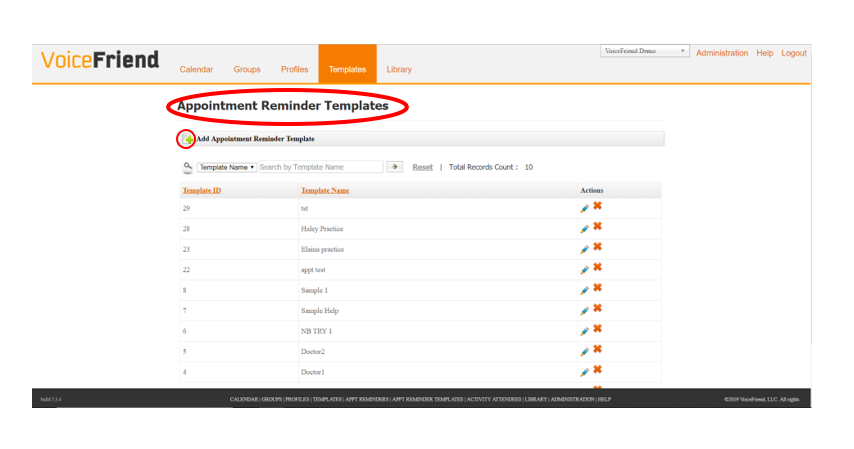
2. Click on the green plus next to Add Appointment Reminder Template to create a new template.
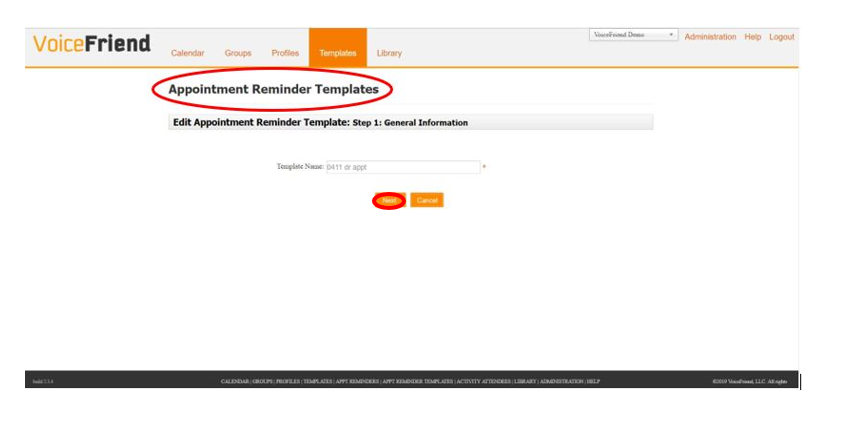
3. Enter your template name - this template can be used many times so you might want to name it based on the type of appointment, such as "daily appointment reminder" or "rehab appointment". Click Next.
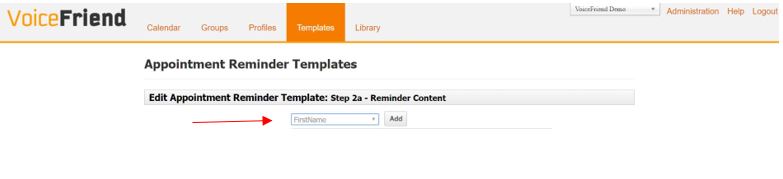
4. Create the content of the message in the text box. If you would like the message to include the first name, last name, appointment date and time or specialist's name, click the drop down field called Add Merge. Select the field that you would like to be added into the message and click Add. This can be done multiple times with the same or different fields.
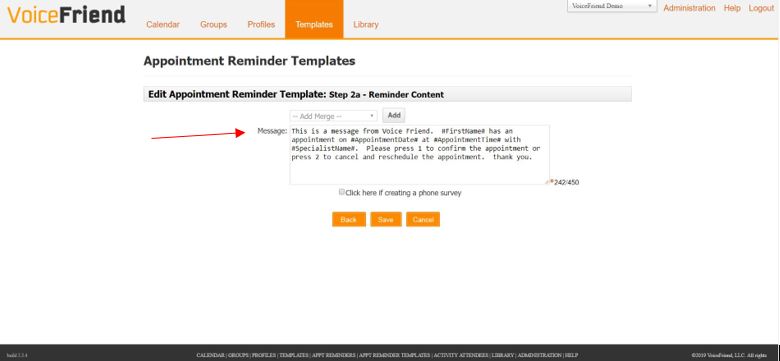
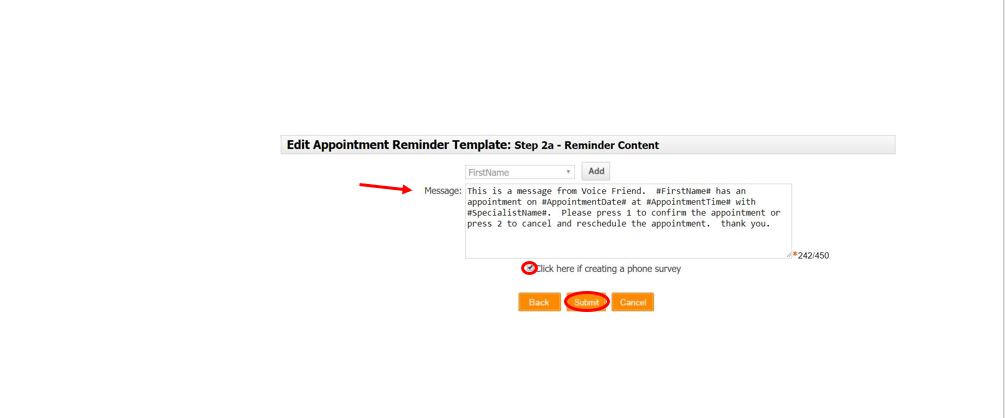
5. If you would like the individual to respond to questions contained in your message, include those questions in your message content. (ie "if you would like to confirm this appointment, press 1. If you would like to cancel this appointment press 2"). Then, click the box below the message content box that says Click here if creating a phone survey. Click submit.
6. Next you will be prompted to name your responses. The system defaults to two responses- 1. Confirm, 2. Cancel. These response names can be changed by typing over the existing response name. If you would like to add a 3rd response or more, click the Add Response button.
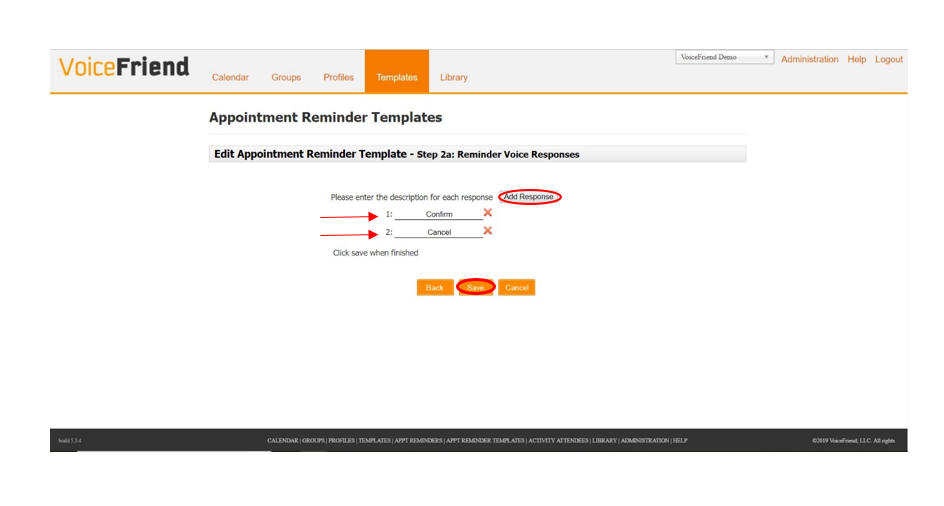
7. When you have finished, click Save at the bottom.
How Do I schedule an appointment reminder?
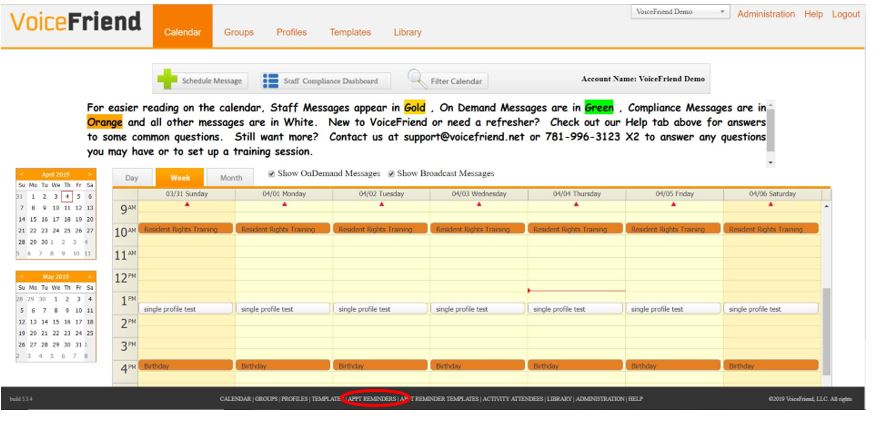
8. Click on the Appt Reminders on the black bar at the bottom of the screen.
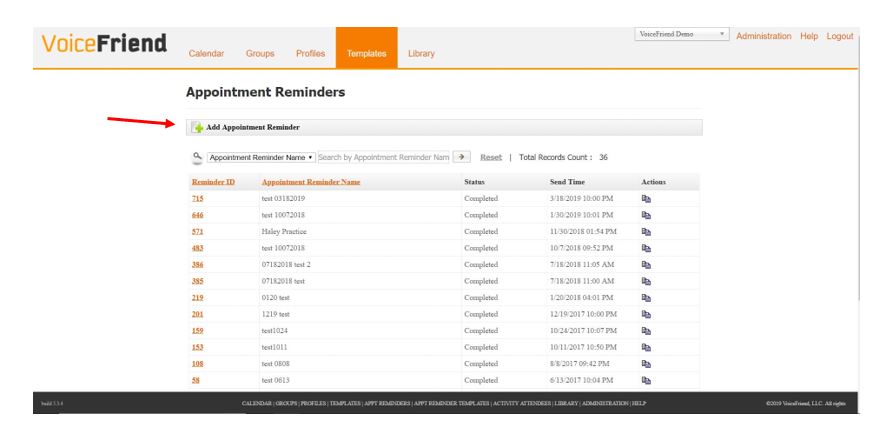
9. Click the green plus sign next to Add Appointment Reminder.
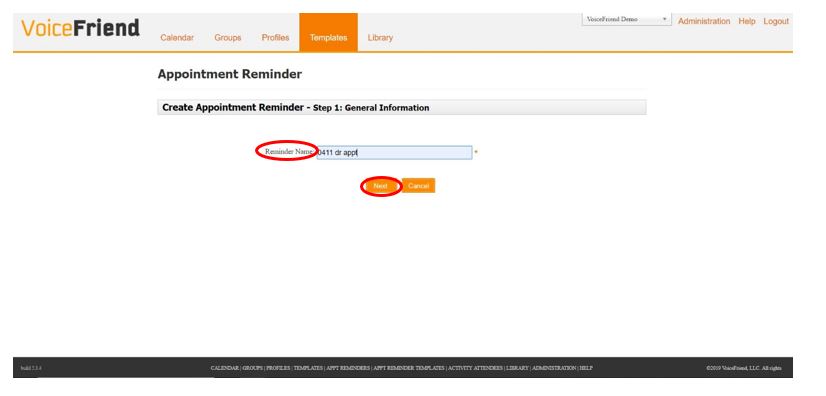
10. Enter the name of what you would like your reminder to be called and select Next.
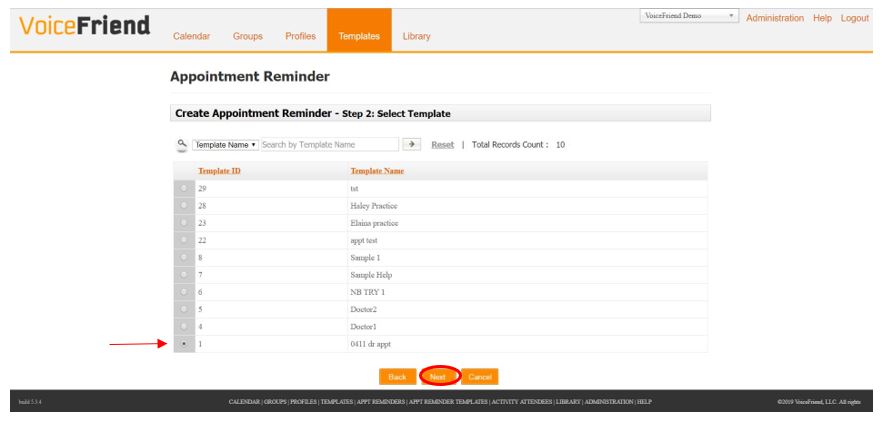
11. Select the appropriate template, such as the one we just created in the previous steps. It is helpful use the same name for your appointment reminder template and appointment reminder. Click the box of the template and then Next.
12. For the next part, you will need a CSV file that contains the information that will be used for these reminders. You MUST have the column titles set as FirstName, LastName, Date,Time, Specialist, and PhoneNumber. It is extremely important that the titles are placed in this order and with these exact names. If something is incorrect in your CSV file, then an error message will appear to indicate which aspect of your file is not in the correct format.
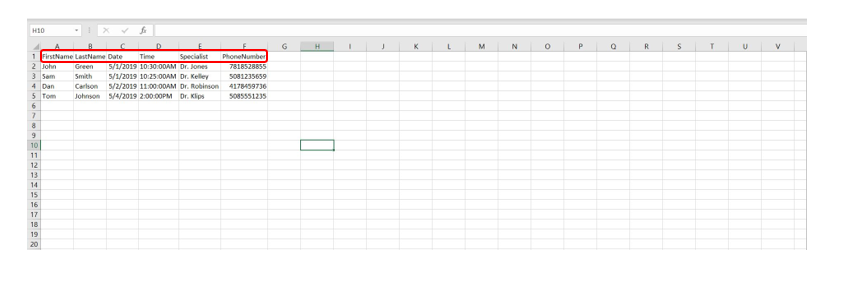
13. Once the file is set up correctly, you can click the Choose File button and select the file which contains the individuals you would like to send appointment reminders to that day.
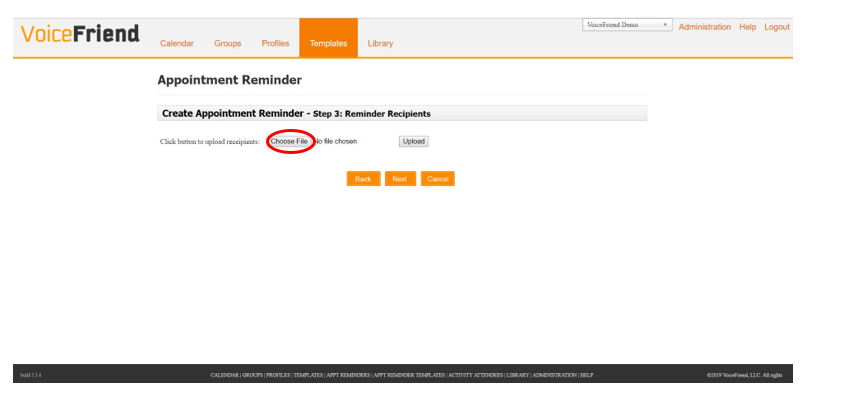
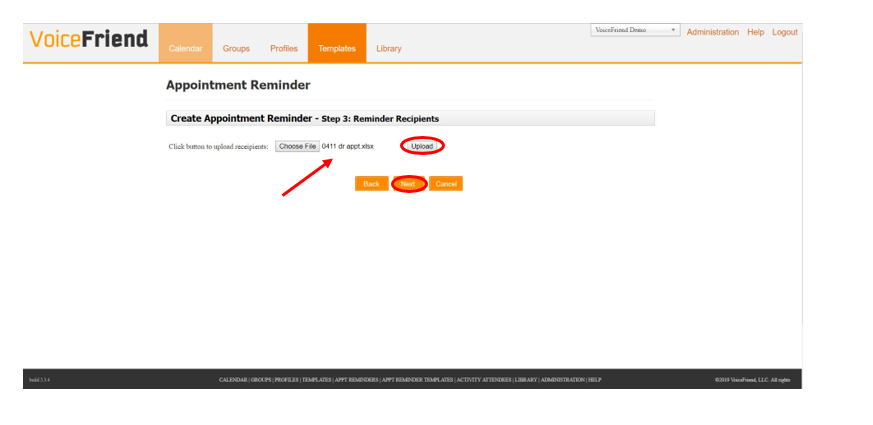
14. The selected file name will show up to the right of the Choose File button. If this is the correct file you that you want to upload for the appointment reminders, click Upload to the right of your file. Click Save.
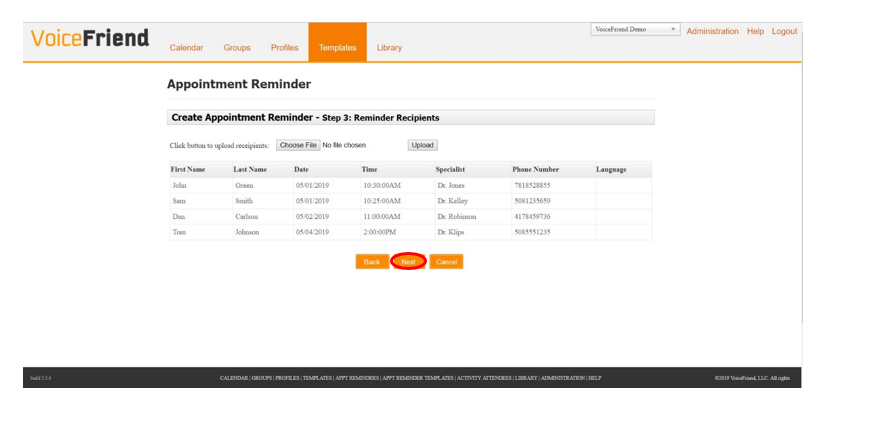
15. After clicking Upload, the information from the CSV document will show up in the same format as the CSV file. After confirming this information is correct, click the orange Next button.
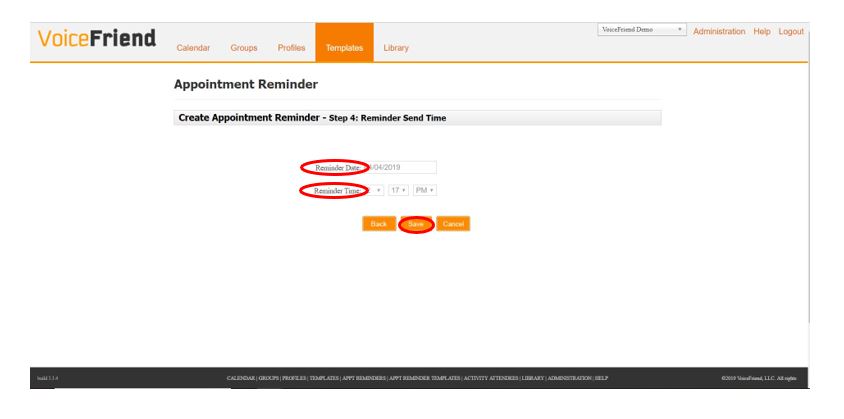
16. Now select the date and time you would like this reminder to go out. In the first box, select the date that you would like to send this reminder. The default is today's date, but you can change this by clicking in the box to the right of the text Reminder Date. When you click on this box a calendar will pop up and you can either select the date shown, or enter one manually.
17. Next, select the Reminder Time. The default for this is always 5 minutes after you click onto the page, however you can change it manually by using the drop down menus. Click Save once you have selected your date and time for the reminder to be sent.
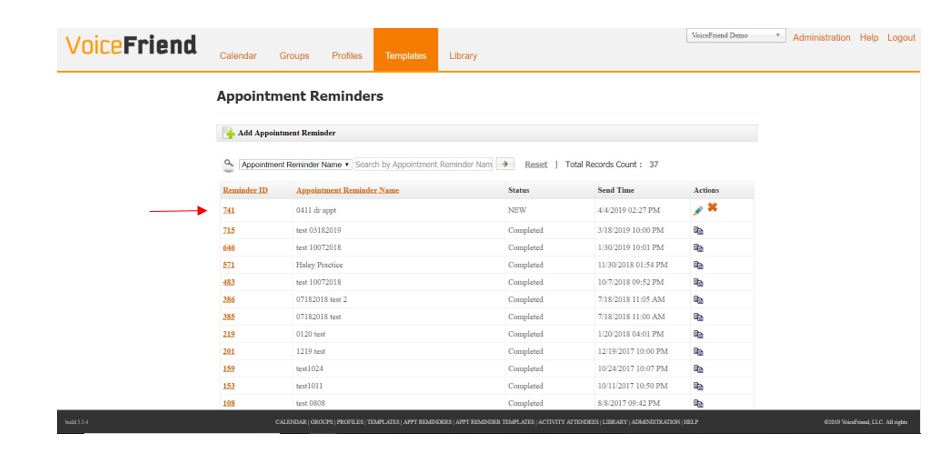
18. This scheduled reminder will now display on the appointment reminders page.
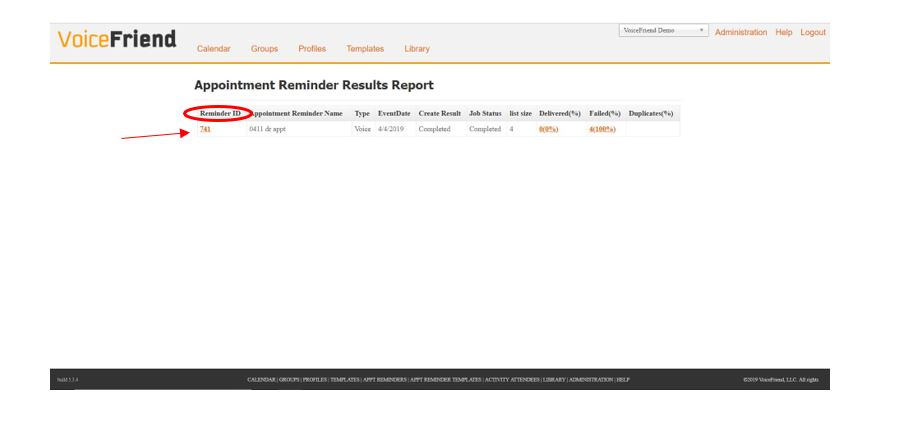
19. To check the results of your appointment reminders after they have been sent, click on the Reminder ID in the far left next to the name of your appointment reminder.
20. If you would like to see what percentage of the messages were successfully delivered, look in the column labeled Delivered. The first number shown (the one outside the parenthesis) shows the number of messages that were successfully delivered. The number inside the parenthesis is the percent of messages that were successfully delivered based on the total number of messages to be sent.
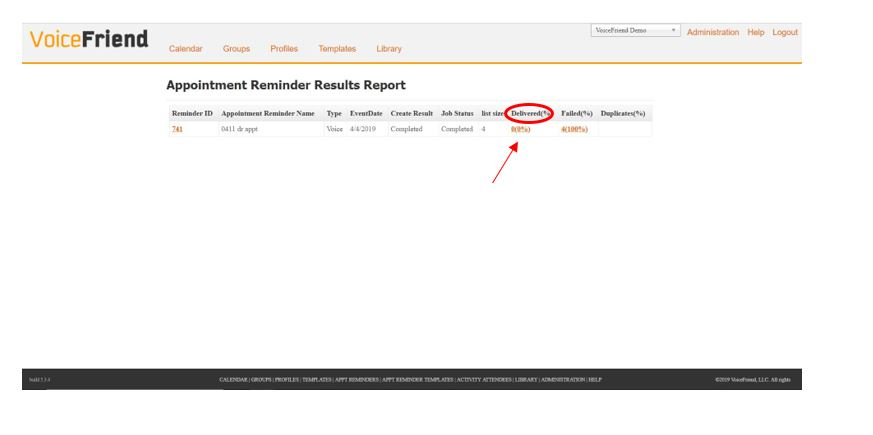
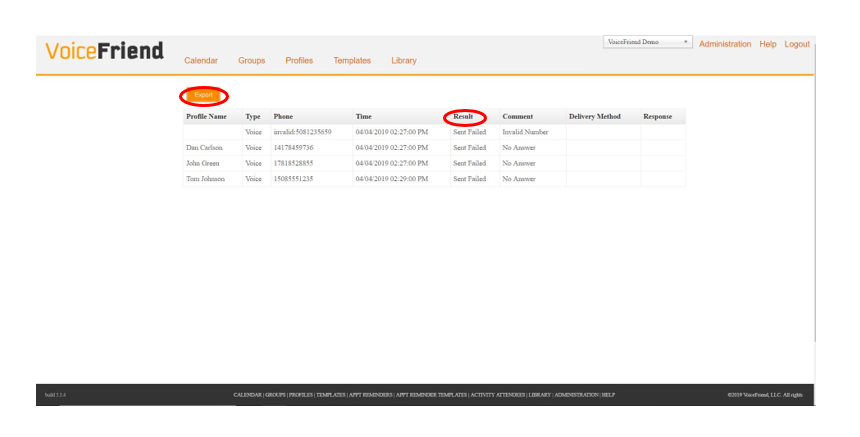
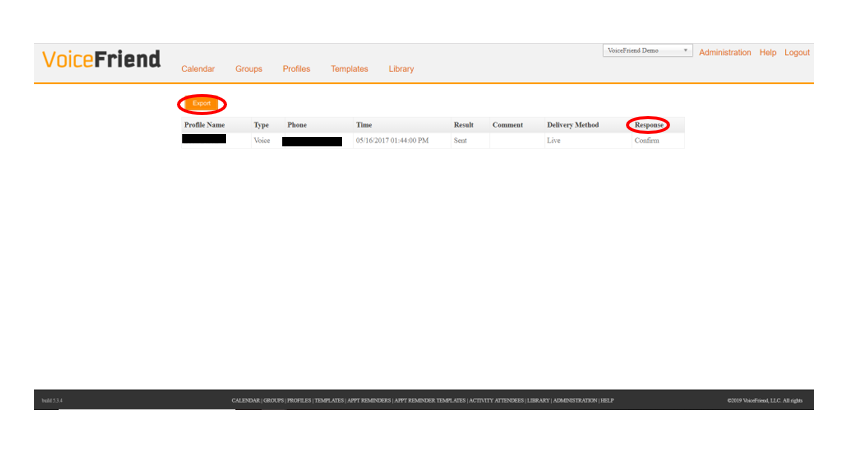
21. If you want to check the responses of the individuals who received the message, click the orange hyperlink in the Delivered column and a report will display all of the people that got the message, the delivery method, and most importantly their response. To export this information into an Excel spreadsheet click the large orange Export button.
22. If you would like to check the messages that failed to be delivered, follow the steps as you did to see the messages that were successfully delivered.